Every time someone lands on your WordPress website, their browser has to download everything on the page, including every image. If those images haven’t been compressed, that’s a lot of unnecessary data being transferred, and your visitors are sitting there waiting.
Most slow WordPress websites have the same problem. Not bad hosting, not a bloated theme, just images that were uploaded straight from a camera or phone without ever being optimized. A single uncompressed hero image can add two to four seconds to your load time. Multiply that across a full page and you’re losing visitors before they’ve read a word.
The fix is straightforward and free. Here’s how to do it properly.
TL;DR: Use a plugin like ShortPixel or Imagify to automatically compress images inside WordPress, or compress them before uploading using a free tool like TinyPNG. Either approach can reduce file sizes by 70–90% with no visible quality loss.
Table of Contents
- What Is Image Optimization in WordPress?
- Why It Matters More Than Most People Realise
- Before You Compress: Get the Dimensions Right
- Option 1: Compress Before Uploading (No Plugin Needed)
- Option 2: Use a WordPress Plugin (Recommended for Most Sites)
- Don't Overlook WebP
- A Quick Checklist
- Frequently Asked Questions
What Is Image Optimization in WordPress?
Image compression reduces the file size of an image without meaningfully affecting how it looks on screen. A photo straight from your camera or phone might be 4–6MB. After compression, that same image can be under 200KB, and your visitors won’t notice any difference.
There are two types of compression worth knowing:
Lossy compression removes some image data to achieve larger file size reductions. Done at a moderate level, the quality loss is invisible to the human eye. This is what most WordPress plugins use by default, and it’s the right choice for most websites.
Lossless compression removes only redundant data with no quality loss at all, but the file size reductions are smaller. Useful for logos or graphics where precision matters.
Why It Matters More Than Most People Realise
Uncompressed images are the most common cause of slow WordPress websites. A single unoptimized hero image can add two to four seconds to your load time, and Google’s own data shows that as load time goes from one second to five seconds, the probability of a visitor leaving increases by 90%.
Page speed is also a confirmed Google ranking factor. A slow site doesn’t just frustrate visitors, it ranks lower in search results, meaning fewer people find you in the first place.
Image compression is one of the easiest performance wins available, but it’s just one piece of the puzzle. For everything else that affects your WordPress site speed, see our full guide on 10 ways to boost page speed for your WordPress site.
Before You Compress: Get the Dimensions Right
Compression reduces file size. Resizing reduces dimensions. You need both.
If your theme displays hero images at 1400px wide and you’re uploading a 4000px photo, WordPress is loading four times more pixels than it needs to, before compression even enters the picture. Resize the image to the correct display dimensions first, then compress it.
Within our WordPress themes for Small Businesses we include the recommended dimensions on every placeholder image, so you can see exactly what size each image should be before you upload. If you’re using a different tool, PicResize handles resizing quickly without needing Photoshop.
A good rule of thumb: no image on your site should be wider than 1600px or larger than 200KB after compression.
Option 1: Compress Before Uploading (No Plugin Needed)
If you prefer not to add another plugin, compressing images before uploading is a perfectly solid approach. You compress them once using a free tool, then upload the optimised file.
The best free tools for this:
- TinyPNG / TinyJPG: Drag and drop up to 20 images at a time and download the compressed versions. Consistently achieves 70–90% reductions with excellent quality. Supports PNG, JPEG, and WebP.
- Squoosh: Made by Google. Gives you more control over compression settings and lets you compare before and after side by side before downloading. Good if you want to fine-tune the result.
- Compressor.io: Another solid online option that supports JPEG, PNG, GIF, and WebP with both lossy and lossless modes.
The main downside of this approach: it only covers new images. If you have hundreds of existing images already uploaded to WordPress, you’d need a plugin to optimise those retroactively.
Lets take TinyJPG for example:
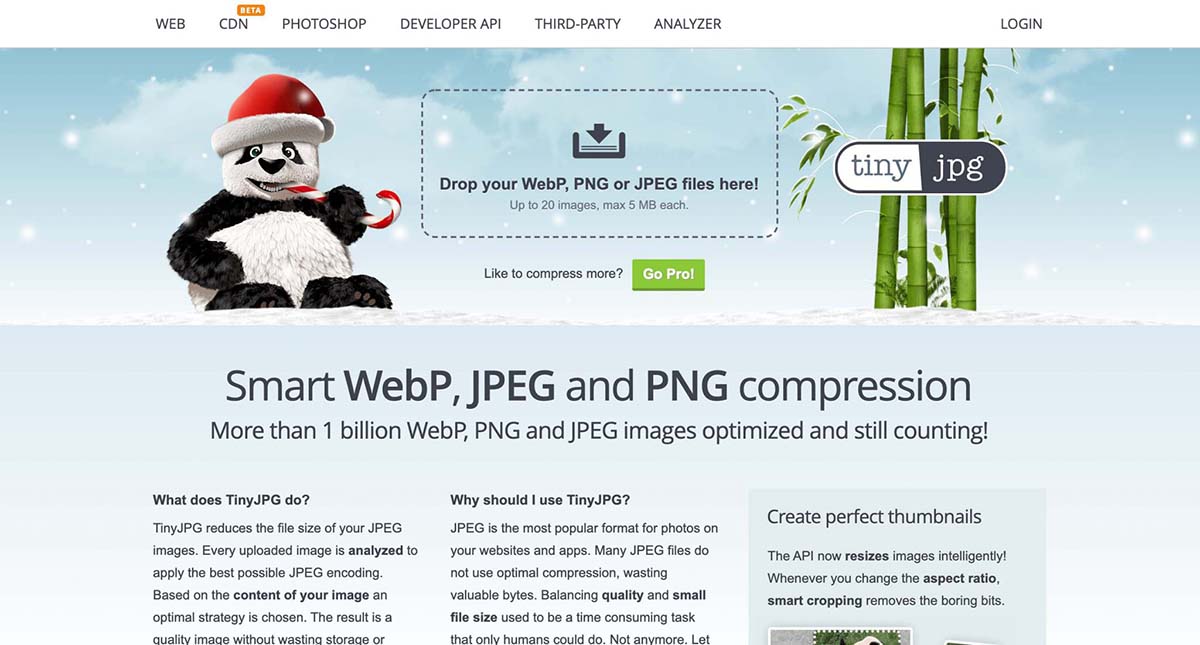
You can drag and drop your images to the area that say “Drop your WebP, PNG or JPEG files here!”
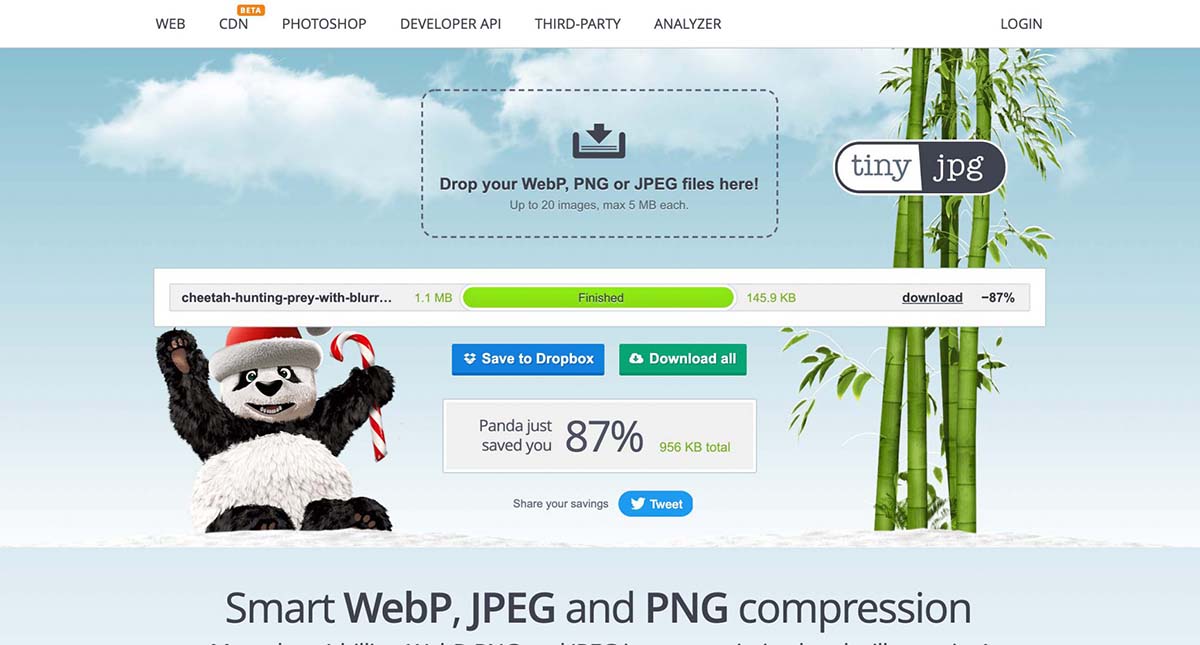
After the compression has finished you can download the image.
In above example you see that the file size of the image has reduced from 1.1 MB to 145.9 KB which is a reduction of 87%, without loosing the quality of the image.
Option 2: Use a WordPress Plugin (Recommended for Most Sites)
A plugin handles compression automatically, new images are optimized on upload, and existing images can be bulk-processed in one go. For most WordPress sites, this is the more practical approach.
There are many options available, but these three are consistently worth considering:
ShortPixel: The strongest overall recommendation for most sites. Excellent compression quality, automatic WebP conversion, and the free plan covers 100 images per month. Both lossy and lossless modes are available.
Imagify: Clean interface, easy to use, and strong compression results. The free plan is more limited than ShortPixel, but the paid plan is competitive. Worth considering if you prefer a simpler setup.
Smush: The most widely installed image compression plugin. The free version handles basic compression well, but WebP conversion and bulk optimisation beyond 50 images require the paid version. Solid, but not the best value compared to ShortPixel.
Which should you choose? For most sites, ShortPixel’s free plan covers the basics comfortably. For a larger site with thousands of images, compare the paid plans, ShortPixel and Imagify are both strong choices.
To install any of these, go to Plugins → Add New in your WordPress dashboard, search for the plugin name, click Install Now, then Activate. Each plugin includes a setup wizard that walks you through the configuration, the default settings work well for most sites. Once set up, use the bulk optimization option to compress your existing image library in one go.
Don’t Overlook WebP
WebP is a modern image format developed by Google that produces significantly smaller files than JPEG or PNG at comparable quality, typically 25–35% smaller than JPEG for the same visual result. All major browsers now support it, and Google actively rewards its use in Core Web Vitals assessments.
If your compression plugin doesn’t automatically convert images to WebP, it’s worth switching to one that does. Both ShortPixel and Imagify handle WebP conversion automatically.
A Quick Checklist
Before you consider images “done” on your WordPress site:
- Images resized to the correct display dimensions before uploading
- All images compressed to under 200KB
- WebP conversion enabled via your plugin
- A compression plugin installed to handle new uploads automatically
- Existing image library bulk-optimised
Image optimisation matters most as part of a complete performance strategy. See how it fits into a full local business website in our guides for dental websites and landscaping websites.
Frequently Asked Questions
How do I compress images in WordPress?
Use an image optimization plugin like ShortPixel or Imagify, they compress images automatically on upload and can bulk-optimize your existing media library. Alternatively, compress images before uploading using a free tool like TinyPNG.
What’s the best image compression plugin for WordPress?
ShortPixel is the strongest all-round option for most sites, excellent compression quality, WebP support, and a generous free plan. Imagify is a close second with a cleaner interface. Smush is the most widely installed but not the best value for sites that need WebP conversion.
Do I need a plugin to compress images in WordPress?
No. You can compress images before uploading using free tools like TinyPNG or Squoosh. The advantage of a plugin is that it handles new uploads automatically and can optimise your existing image library retroactively.
What image format is best for WordPress?
WebP. It produces smaller files than JPEG or PNG at equivalent quality, is supported by all modern browsers, and is favoured by Google’s Core Web Vitals. Most optimisation plugins convert to WebP automatically.
Does compression reduce quality?
At moderate lossy compression levels, the quality difference is invisible to website visitors. Most plugins default to a setting that reduces file size by 70–90% with no perceptible quality loss.
Should I compress images before or after uploading to WordPress?
Either works. Compressing before uploading is slightly better for server performance. Using a plugin is more practical for most sites because it handles everything automatically, including your existing image library.
Why does image optimisation matter for SEO?
Page speed is a confirmed Google ranking factor. Images are the most common cause of slow WordPress sites. Compressing them improves your Core Web Vitals, particularly Largest Contentful Paint (LCP), which directly affects how Google assesses and ranks your pages.