

WordPress 7.0 lets you upload custom fonts and install Google Fonts from Appearance → Fonts. The files are stored on your own site, and the font management screen now works with classic themes as well as block themes.
This guide covers installing a font and applying it through the Site Editor or the Typography settings in our themes.
What Is the WordPress 7.0 Font Manager?
WordPress introduced the Font Library in version 6.5 for block themes. Version 7.0 brings it to classic themes too, including those that use the Customizer.
You’ll find the Font Manager, called the Font Library in the WordPress documentation, under Appearance → Fonts. From there you can:
- Upload font files from your computer
- Browse and add fonts from Google Fonts
- Preview fonts before committing to them
- Remove fonts you no longer need
Why Does It Matter Where Your Fonts Are Hosted?
If your theme loads fonts from Google’s servers, hosting them locally changes how visitors’ browsers fetch those files.
Fewer connections to external servers
Local fonts remove the need to connect to Google’s servers for those files. That can help loading times, though the result depends on your hosting, caching, and the size of the fonts you use.
Fewer requests to Google
Loading fonts locally avoids sending visitors’ font requests to Google. This addresses that particular source of data sharing; it doesn’t establish GDPR compliance for the rest of your site.
When you install a Google Font through the Font Manager, WordPress downloads the files to your server. You still need to apply the local font and turn off any existing Google Fonts connection in your theme or plugins.
How to Find the Font Manager in WordPress 7.0
In WordPress 7.0 or later:
- Log in to your WordPress dashboard
- Go to Appearance → Fonts
The Library tab shows the fonts registered with the Font Library, including any your theme provides there. Use the other tabs to upload files or browse Google Fonts.
How to Upload Your Own Font
If you have a font file on your computer and a license that allows web use, you can upload it to WordPress:
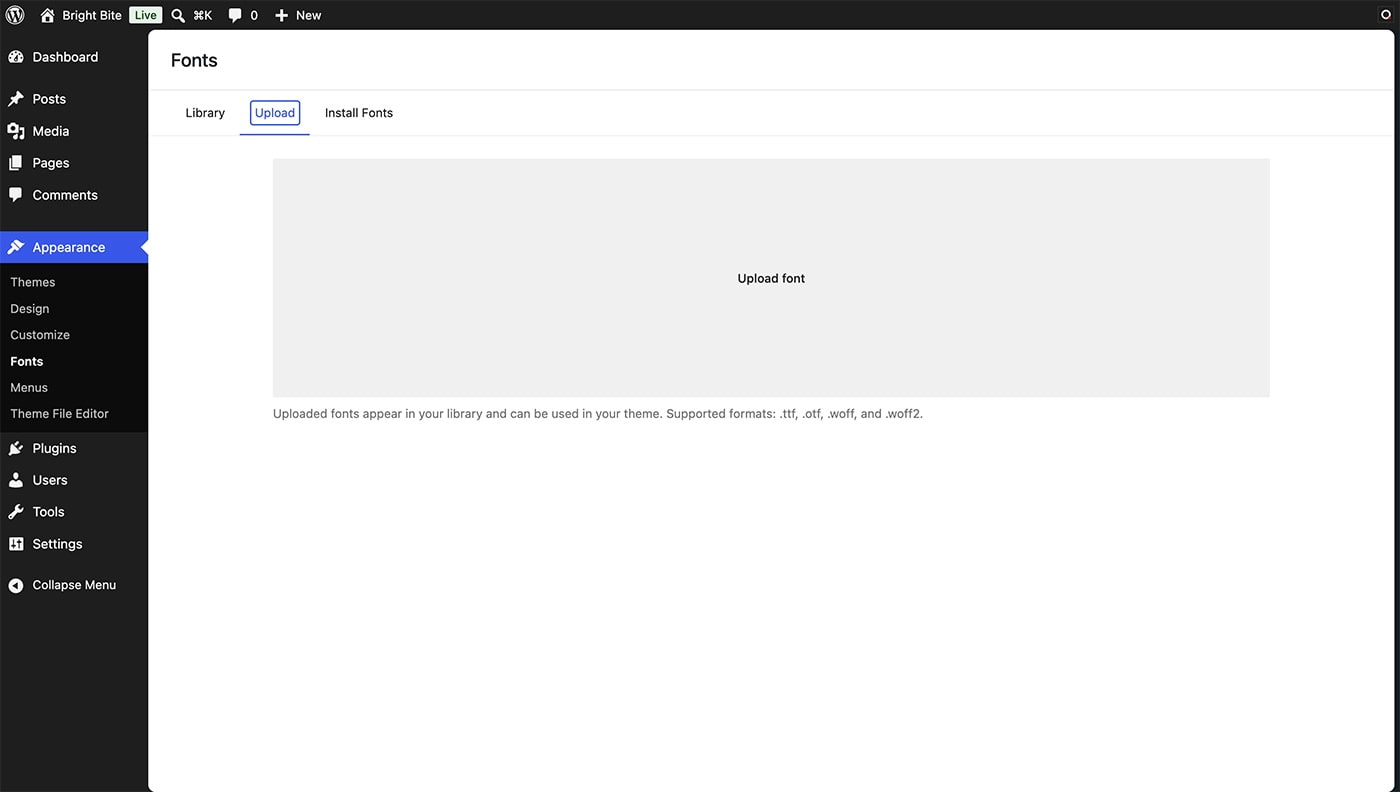
- Go to Appearance → Fonts
- Click the Upload tab
- Click Upload Font and choose your file
- Check that the font name looks right, and set the weight (Regular, Bold, etc.) and style (Normal, Italic) for each file
- Click Install
The font is now in your library. You’ll apply it to your text or headings in a separate step below.
If you have multiple weights of the same font, such as Regular and Bold, upload them together as one font family.
How to Add a Google Font (Hosted on Your Own Site)
You can also browse Google Fonts from the Font Manager and install the files on your own server.
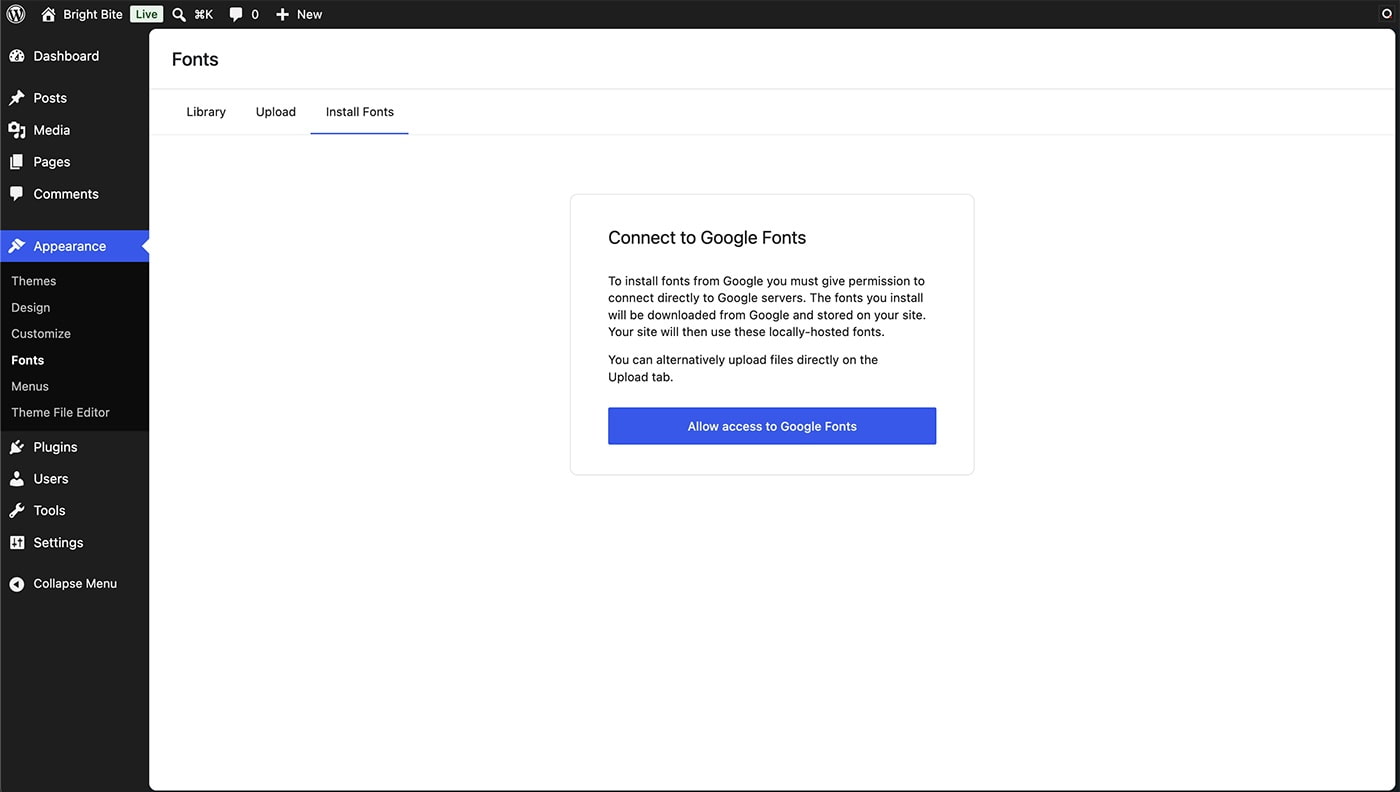
- Go to Appearance → Fonts
- Click the Install Fonts tab
- Click Allow access to Google Fonts
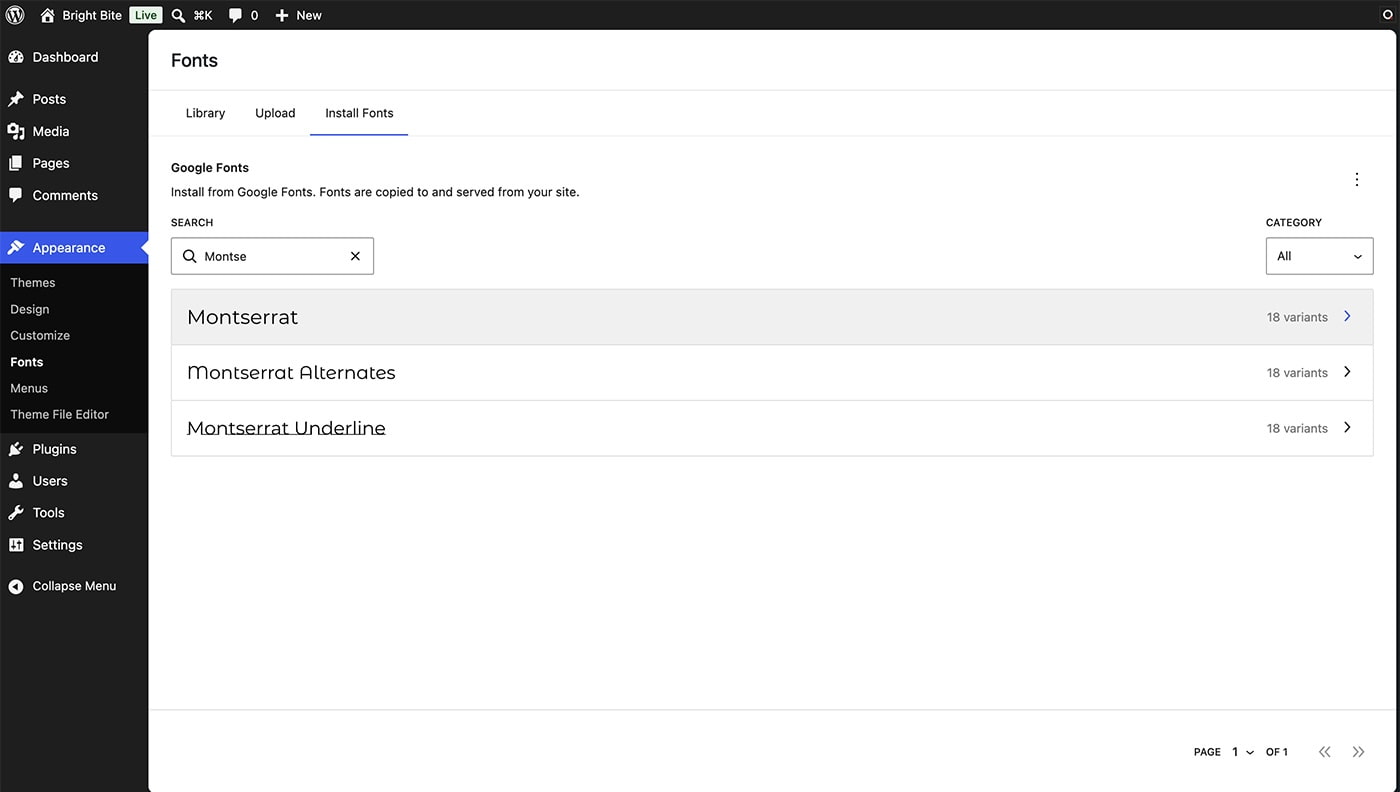
- Use the search field to find a font, then select it
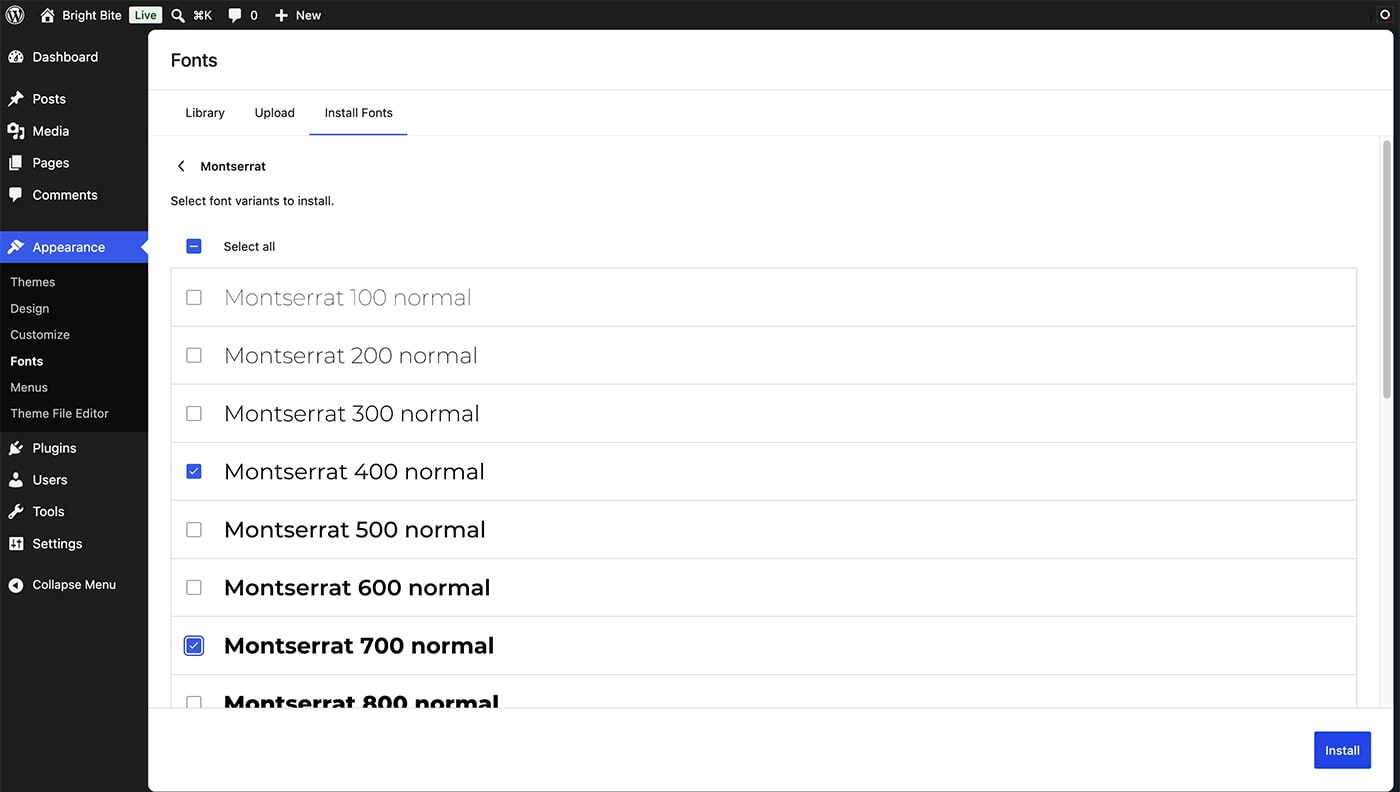
- Select the weights and styles your site uses
- Click the Install button in the bottom right corner
WordPress downloads the selected files and adds the font to the Library tab. You can then apply it in the same way as an uploaded font.
Tip: Only select the weights your design uses. Regular (400) and Bold (700) may be enough; include italic styles if your content needs them.
Which Font File Format Should You Use?
The Font Manager accepts WOFF2, WOFF, TTF, and OTF files. If you have a choice, use WOFF2:
- WOFF2 is a compressed font format supported by current browsers. It usually gives you smaller files than TTF or OTF.
- TTF and OTF work too. If those are the only files you have, ask the provider for a WOFF2 version or use a font conversion tool, provided your license allows it.
If you’re getting a font from a designer or font marketplace, ask for the WOFF2 files and check that your license covers use on your website.
How to Apply Your Font Using the Site Editor
With a block theme, you can apply your new font through the Site Editor.
- Go to Appearance → Editor
- Open Styles
- Click Typography
- Choose Text or Headings, then open the font picker
- Choose your font from the list
- Click Save
You can set different fonts for headings and body text. A distinctive heading font paired with a clean, readable body font goes a long way.
How to Apply a Font in a QreativeThemes Theme
If your site runs on one of our WordPress themes, you can apply the font through the Customizer.
Our themes include a Typography panel with fields for your heading font, body font, and other sections.

Once you’ve installed a font through Appearance → Fonts:
- Go to Appearance → Customize → Typography
- Enter the font family name from the Font Library in the appropriate Font Family field, for example Inter or Playfair Display
- Click Publish
The font will apply to the sections controlled by those settings.
Copy the font family name from the Font Library, including spaces. For example, enter Playfair Display in the Font Family field.
To stop the theme from loading its default fonts from Google, go to Appearance → Customize → Typography → Settings. Turn on “Disable Google Font Connection” and publish the change.
A Few Things to Watch Out For
Don’t upload font weights you won’t use
Keep the font weights your design needs. Loading extra font files adds to the amount visitors have to download, so check which weights your headings, body text, and buttons use.
Turn off the old font connection
Once you’ve moved your fonts to the Font Manager, disable the old plugin’s font loading or deactivate it if you no longer need it. Leaving both setups active can cause duplicate font requests or conflicting styles.
Use WOFF2 where possible
WOFF2 files are usually smaller than equivalent TTF or OTF files. Ask the font provider for a web version, or convert the files if your license permits it.
Frequently Asked Questions
Do I need to update my theme to use the Font Manager?
You need WordPress 7.0 or later to access the Font Library with a classic theme. Applying an installed font through your theme’s controls depends on the typography options that theme provides.
Will my existing fonts break after updating to WordPress 7.0?
The Font Manager doesn’t replace your existing font settings automatically. After updating, check that your fonts still display correctly, especially if a theme or plugin handles them.
I’m using one of your themes. Where do I apply the font once it’s installed?
Go to Appearance → Customize → Typography and enter the installed font name in the “Font Family” field for the section you want to change. Then click Publish.
Can I use the Font Manager alongside Elementor or another page builder?
Page builders often have their own font settings. Check your builder’s support for fonts installed through WordPress, and use its typography controls for content it manages. Use your theme’s settings for the sections controlled by the theme.
Does this mean I can uninstall my Google Fonts plugin?
Probably, yes, if you only used it to upload fonts or host Google Fonts locally. Move the fonts over, apply them, and deactivate the plugin. Check that the fonts still look right across your site before removing it permanently.