
A dental website should help a prospective patient decide whether the clinic is suitable and make the next step easy. That requires more than an attractive homepage. The site must explain treatments, introduce the dental team, answer practical questions and provide a clear appointment route.
Good design reduces uncertainty. It does not pressure someone into booking or promise a clinical result.

TL;DR: State the clinic’s location and services immediately, use real photographs, organize treatments around patient questions, show professional credentials, publish practical information and test the appointment journey on a phone.
1. Make the first screen useful
The top of the homepage should tell visitors what kind of dental clinic they have reached, where it is and what they can do next. Avoid opening with a slogan that could belong to any healthcare business.
- Clinic type and location
- The main services or patient groups
- A visible appointment or contact button
- A clickable telephone number
- Current opening hours or a clear link to them
- An original photograph of the clinic or team
A headline such as “Family and cosmetic dentistry in Haarlem” communicates more than “Confidence starts with your smile.” Supporting text can add the clinic’s approach after the essentials are clear.
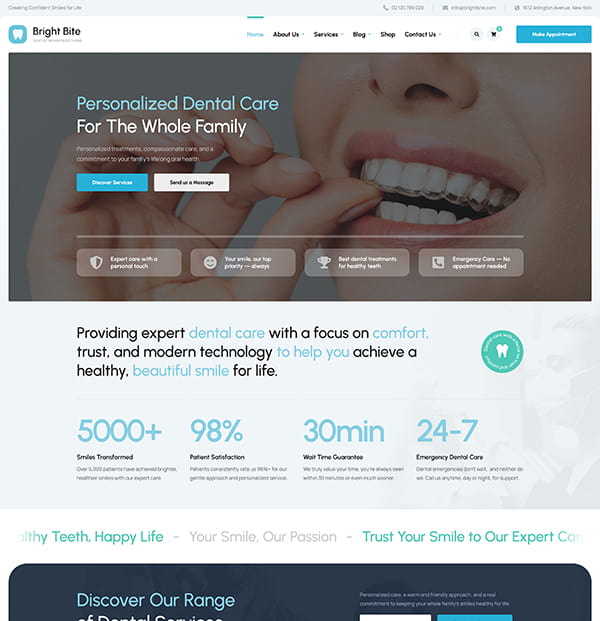
Need a Website for Your Dental Clinic?
Bright Bite includes ready-made treatment pages, dentist profiles, pricing sections, and appointment forms—so you don’t have to start from scratch.
2. Organize navigation around patient decisions
Patients should not need to understand the clinic’s internal departments. Use familiar labels such as Treatments, Dentists, Fees, New Patients and Contact. Keep the main navigation short and place secondary policies in the footer.
The companion guide to the pages a dental clinic website needs explains the recommended structure in detail.
3. Write treatment pages that inform rather than sell
Each important treatment page should explain who provides the care, what an assessment may involve, possible options, practical preparation, fees or finance information where relevant, and how to arrange a consultation.
Use plain language alongside accurate clinical terms. Avoid guarantees, exaggerated before-and-after claims and copy that presents one treatment as suitable before a dentist has assessed the patient.
A useful treatment page answers
- What is the treatment?
- Why might a dentist discuss it?
- What happens during assessment and treatment?
- Who provides it and what are their qualifications?
- How many visits may be involved?
- What costs or payment options apply?
- What alternatives or limitations should a patient discuss?
- How can the patient ask a question or book?
4. Show the dentists and team
People want to know who may treat them. Give every clinician a consistent profile with a recent photograph, role, qualifications, registration details where applicable, professional interests and languages spoken.
Keep biographies specific. “Dr. Ahmed has a particular interest in restorative dentistry and explains each option before treatment begins” is more useful than “Our passionate team provides world-class care.”
5. Use original photography
Photographs help a first-time patient understand the setting. Show the entrance, reception, treatment rooms, accessibility features and team. Consistent, well-lit images usually communicate more trust than generic photographs of perfect smiles.
Obtain written permission before publishing identifiable patient images. Clinical before-and-after photography may be subject to additional consent and advertising requirements in your jurisdiction.
6. Present trust information in context
Qualifications, professional registrations, infection-control information and recognized memberships should appear where patients need them. Reviews may help describe communication and the patient experience, but they should not imply that everyone will receive the same outcome.
Check the dental advertising and testimonial rules that apply in your country. When replying to public reviews, protect patient confidentiality and avoid confirming treatment details.
7. Make fees and practical details easy to find
Unclear costs and policies create hesitation. Publish representative fees or explain how estimates are prepared. Include payment methods, insurance arrangements, finance information, cancellation terms and what is included in a consultation.
- Address, map and directions
- Parking and public transport
- Wheelchair access and other accessibility details
- Opening hours and emergency arrangements
- New-patient registration process
- Accepted insurance or reimbursement information
- Languages spoken
8. Design the appointment journey for mobile
Many visitors will reach the site from a phone. Keep buttons easy to tap, forms short and text readable without zooming. Offer a telephone or enquiry option for patients who are unsure which appointment to choose.
Collect only the information needed at that stage and use an appropriate secure system for personal and health information. A confirmation screen or email should explain when the clinic will respond and what happens next.
9. Support local search with clear information
Use consistent clinic details on the website and Google Business Profile. Create distinct pages for real locations and important treatments when you have useful information for each. Link related treatments, clinician profiles and appointment pages naturally.
Search visibility cannot be guaranteed by adding a city name repeatedly. Accurate information, a technically sound site and helpful content give search engines and patients a clearer understanding of the clinic.
10. Test the website like a new patient
- Open the homepage on a phone.
- Identify the location and main treatments.
- Find the appropriate dentist or clinician.
- Check fees, opening hours and directions.
- Try to request an appointment.
- Read the confirmation and note the expected response time.
- Fix every unclear label, broken link or unnecessary form field.
Platform choice affects how easily the clinic can maintain these improvements. Compare the options in WordPress vs Wix vs a custom dental website.
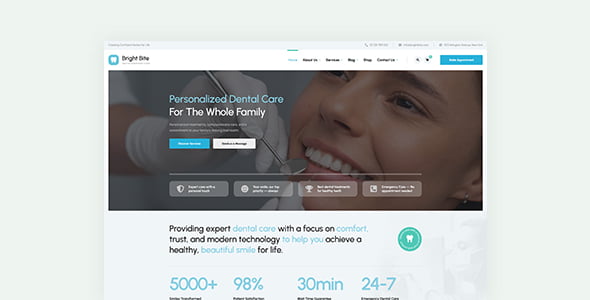
A Better Website for Your Dental Clinic
Present your treatments, dentist profiles, pricing, and appointment options with a WordPress theme built for dental clinics.