If your website feels slow, installing a caching plugin is one of the fastest ways to improve performance.
In this guide, I’ll show you exactly how to install and configure WP Fastest Cache on your WordPress website using recommended settings that work well for most small business sites.
By the end of this tutorial, your website should load significantly faster, with less strain on your hosting server.
What Is Caching (And Why It Matters)?
Normally, when someone visits your website, WordPress:
- Runs PHP scripts
- Connects to the database
- Builds the page dynamically
- Sends it to the visitor
This process happens every single time someone loads a page.
A caching plugin creates a static version of your pages and serves that instead.
That means:
- Faster load times
- Reduced server usage
- Better Google PageSpeed scores
- Improved user experience
For small business websites, caching can make a dramatic difference with almost no technical effort.
Step 1: Install WP Fastest Cache
Follow the steps below to install the WP Fastest Cache plugin from the WordPress plugin directory:

- Go to the “Plugins → Add New”
- At the search field enter “WP Fastest Cache”
- Press the “Install Now” button and wait
- When the “Activate” button shows up click that button
Step 2: Recommended WP Fastest Cache Settings
Now that the WP Fastest Cache plugin is installed, it’s time to configure it to enable caching for your website. Click the plugin tab in the dashboard menu and enable these settings:
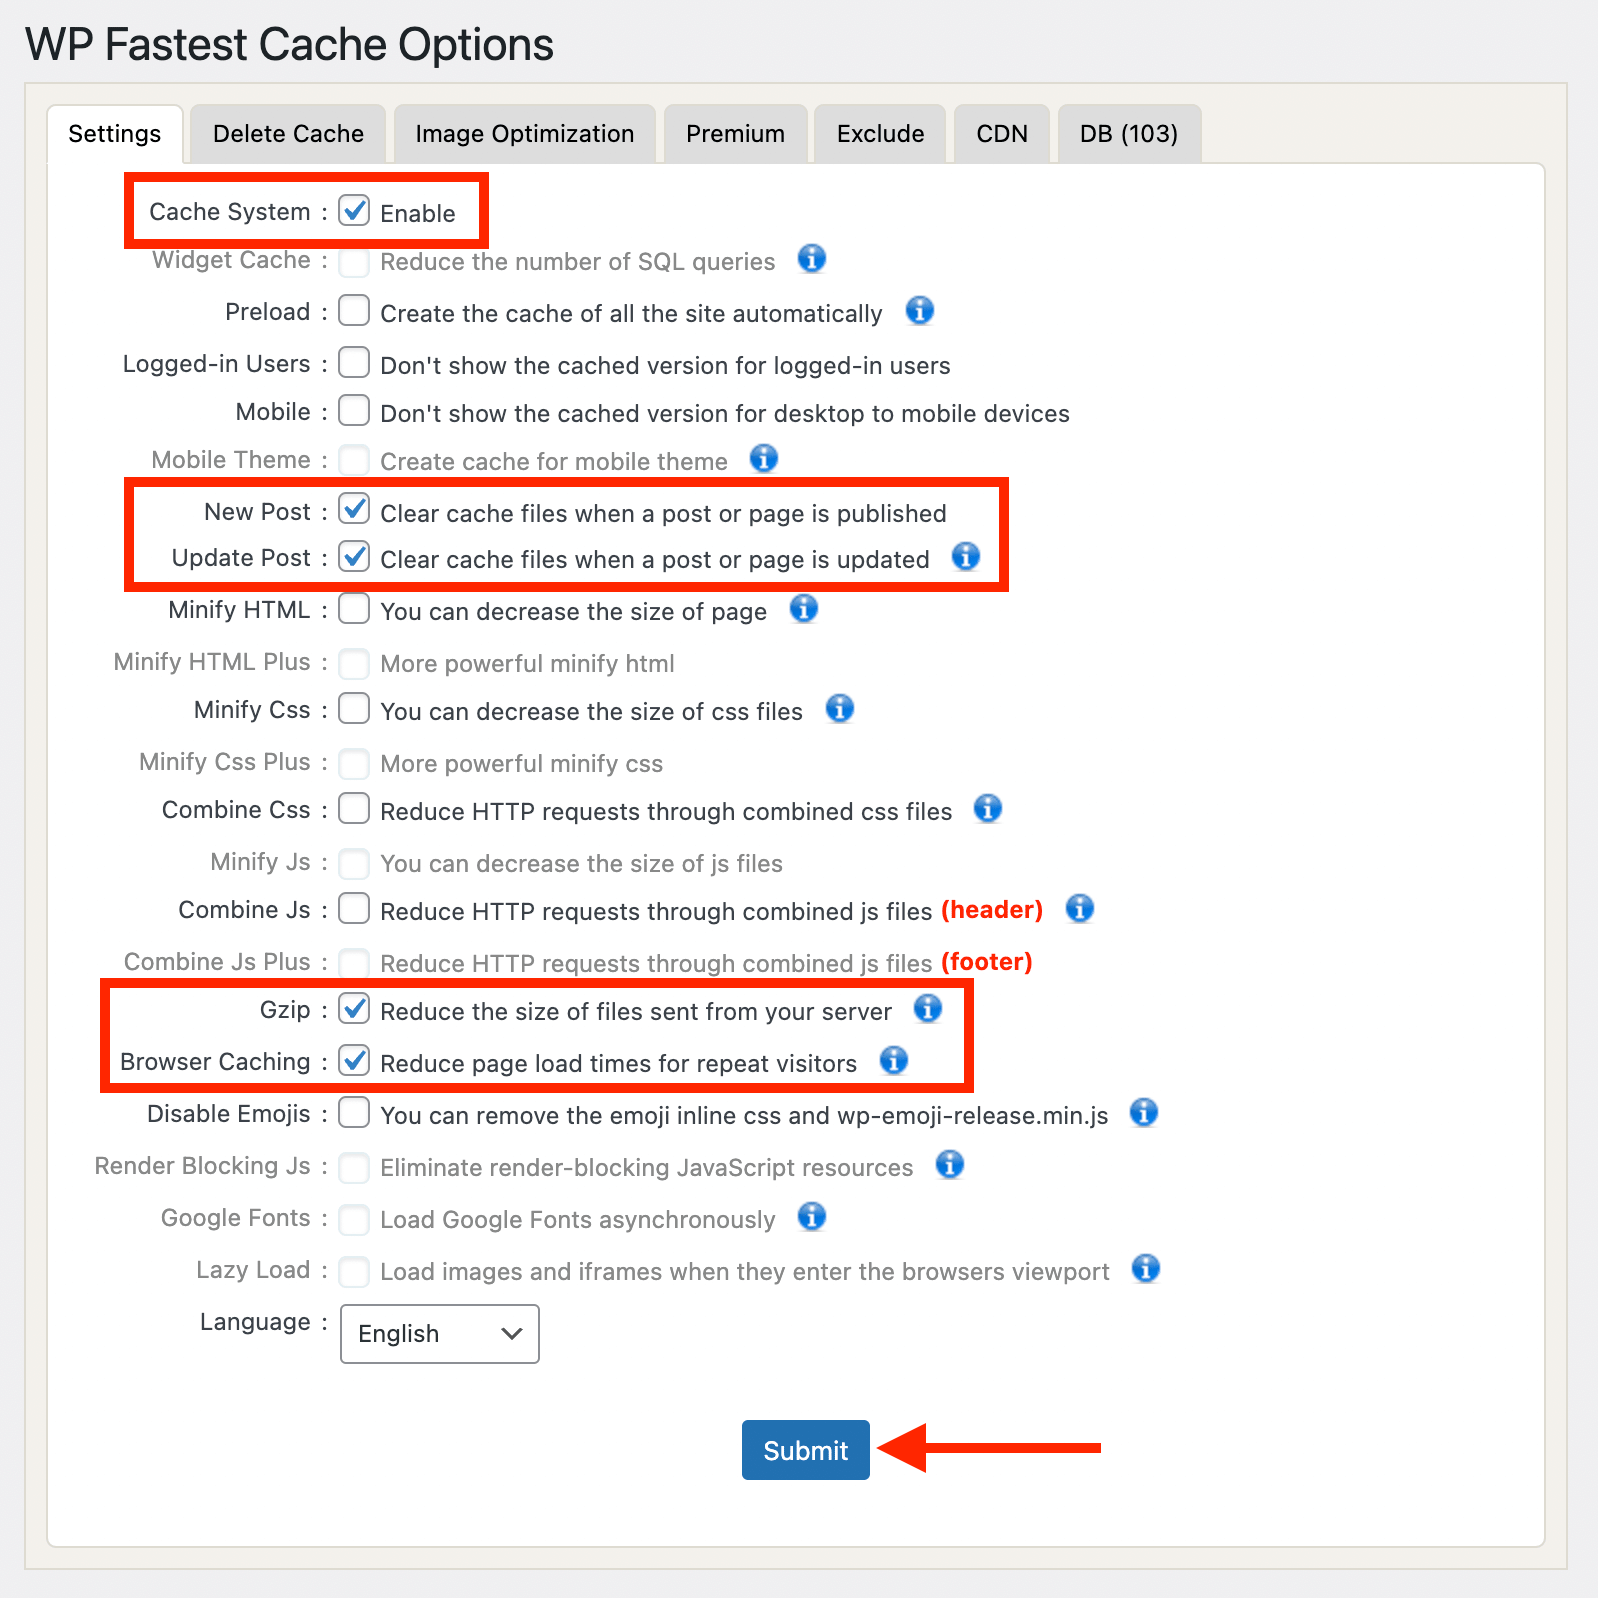
- Cache System – Turns caching on
- Preload – Automatically generates cache
- Logged-in Users – Enable only if you don’t have a membership site
- Mobile – Creates cache for mobile users
- Gzip – Compresses files for faster delivery
- Browser Caching – Stores static files in visitors’ browsers
After enabling the settings mentioned above, make sure to save your changes. To do this, simply click the Submit button at the bottom of the page. This will ensure that caching is fully activated on your website.
Step 3: Clear the Cache
Whenever you update your website, you may need to clear the cache.
To manually clear it:
- Hover over the admin bar at the top
- Click Clear All Cache
- Refresh your page

Does WP Fastest Cache Really Improve Speed?
Yes, significantly. When configured correctly, it:
- Reduces server processing time
- Lowers Time to First Byte (TTFB)
- Decreases page load time
- Improves performance scores in tools like Google PageSpeed Insights
For most small business websites, caching alone can cut load times by 30–60%.
Quick Setup Checklist (For Busy Business Owners)
If you just want the essentials:
- Install and activate the plugin
- Enable Cache System
- Enable Gzip
- Enable Browser Caching
- Enable Minify HTML & CSS
- Click Submit
- Clear Cache
Done. Your website is now significantly optimized.
Final Thoughts
Installing and configuring WP Fastest Cache is one of the easiest ways to speed up your WordPress website.
It’s beginner-friendly, effective and free, making it an excellent first step in performance optimization.
If you’re unsure about advanced settings or your website behaves unexpectedly after enabling optimization features, make sure to check if combine CSS and combine JS options are disabled.